
Equipment
How to Build Your Own Home Driving Range
Chances are you’ve already read our uber-popular article on how to build a home golf simulator for under $2,000, but now the weather is finally warming up and it’s time to move your practice sessions outdoors once again!
Sure, when the weather is nice, ideally we’d all be out on the course improving our game one swing at a time. But of course life always seems to get in the way of playing 18—whether it’s babysitting, long work hours, or a spouse who thinks you spend too much time at the 19th hole after your round.
So how find a way to get some fresh air and work on your golf game given your busy schedule? The answer is to build your own backyard driving range—and the process (and cost) of doing so is easier than you might have imagined.
Many people have used their home driving range to improve their ball striking with every club in their bag. You’d think all you need to create your own homemade range is a ball, a tee, a club, and a wide open field. That’s technically true, but a more professional setup will help make your practice sessions more effective, and far more fun!
Ok, now that we’re on the same page, let’s talk about how to go about actually building your home driving range right in your own backyard. First, let’s start with the basics…
Step 1 – Finding Room for Your Home Driving Range
In your backyard driving range setup you’re going to want to secure enough area so that you can:
- Analyze your ball’s trajectory as it flies off the tee,
- Have space to setup video equipment from multiple different angles, and
- Won’t knock your teeth out off a richochet ball.
The exact specs can vary slightly but a 20′ x 30′ clearing is the approximate area you’ll need.

Step 2 – Buying the Right Net
If you do happen to have an empty pasture and 300 spare yards around you should consider yourself very lucky because you just saved yourself a few hundred bucks on a net—although you’ll be shagging balls more often than swinging . The truth however is that most of us struggle to find the space just to have room to see the ball flight let alone being able to ‘grip it and rip it’ into the atmosphere. Therefore arguably your most important purchase for building a backyard driving range is your net.
When building your backyard driving range the net you purchase is one area where you don’t want to skimp, so be prepared to open the wallet a little wider here.
First you want a net that is wide enough to capture any errant shots that might shoot left or right off your tee.
Second, you also need the net to be strong enough to withstand thousands of hits without allowing balls to break through and crash into your neighbor’s bay window.
If you really think about it, many of the other accessories needed for a backyard range are optional so the net is where you want to put the bulk of your budget—after all, you can always add the accessory items later.
With that in mind here are a few of our favorite models when it comes to both build quality and long-term durability.
- THE NET RETURN – The Net Return is hands-down one of the best golf practice nets you can find as its sturdy construction allows it to withstands impact up to 200 mph without budging! Granted, at almost $600 it’s not cheap but if you’re looking to outfit your home driving range with the “Cadillac” of golf nets, this would be the one. In addition to being solid as a rock, The Net Return also features a guaranteed ball return which saves you money on buying a separate feeder/shag bag and with its supposed 250,000+ shot life span you’ll be on the PGA TOUR by the time you need to purchase a replacement.
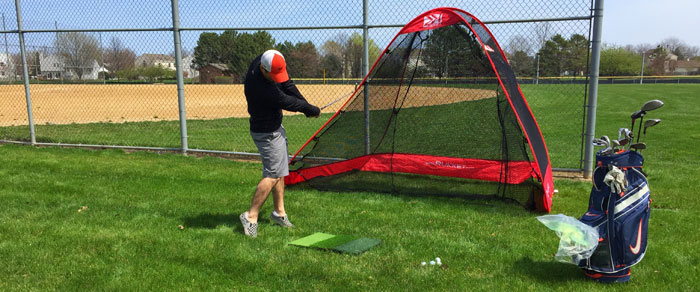
- THE RUKKNET – For those of you who aren’t ready to lay out $600 on a net The RukkNet is a much more affordable alternative (priced at $199) with 10′ x 7′ x 5′ dimensions that should be adequate for every club in your bag. The RukkNet features a double net system and is far easier to set up and break down versus the larger Net Return, making it a great alternative for those of you who want to be able to take your range down and store it when not in use. The RukkNet is also a personal favorite of ours and you can read our full review here. If you’re looking for something with a larger net area (although slightly less portable) check out the RUKKET SPDR which is pictured above.
- THE CALLAWAY TRI-BALL – Although a bit less sturdy (but also less expensive) than the first two options, the Callaway Tri-Ball is a quality product from a trusted name. It comes in three different sizes and has a unique shape that allows for practice with everything from a driver to a wedge.
The good thing about constructing your net is that you have options in just about every price range, and you can always “upgrade” your backyard driving range with newer equipment as you have the budget. When selecting your net the four biggest things to consider are cost, durability, portability, and size.
Some people have had just as much success building a PVC frame and using a quilt as the netting. If you’re handy and enjoy a project you can save yourself some money building something like this:
[embedyt] http://www.youtube.com/watch?v=-p11qs4E2T0&width=742&height=419[/embedyt]
Step 3 – Finding a Realistic Swing Mat
Something you’ll learn when putting your backyard driving range together is that there is no ‘plan’ that is set in stone. With an indoor golf simulator some things are mandatory such as a video processing system, a projector, a swing mat, etc. With the backyard version your main goal is to get repetitions in, no matter how you go about doing so.
Take for example a swing mat. If you have a closely mowed lawn you might decide to forgo the swing mat altogether. Other people prefer the consistency of a realistic turf mat (and don’t want to divot up their lawn on chop swings.)
If you do opt to use a swing mat, there are a few features you should look for. The ability to use wood tees for example offers the realistic feel you get when pulling out the driver on the course. Some mats use only plastic tees which can mess with your mental approach if you don’t use them normally.
Swing mats also need to be durable. The cheaper mats on the market will rip and snag quickly and will need to be replaced more often.
One of the best residential mats on the market comes from D.W. Quail Golf. It is said to be 30% more durable than other industry swing mats which is especially good for practicing other types of shots besides drives.
Something else to consider in a swing mat is having an area big enough for your to stand on while taking your swing. A mat that is approximately 4′ x 5′ like this one should do the trick. A standing area creates a more authentic depiction of the tee area and keeps you from ‘swinging up’ to a raised platform.
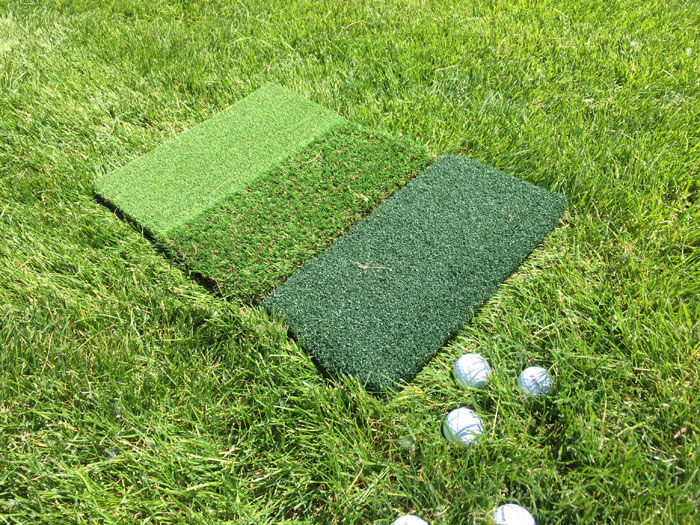
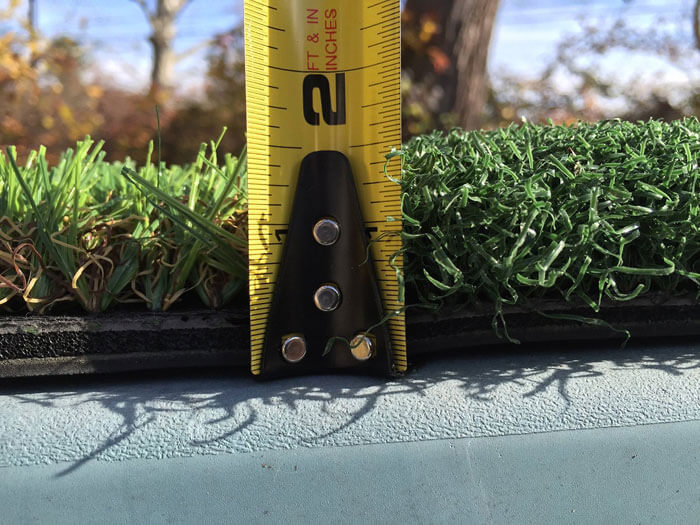
If you really want to trick your backyard setup out you can also add mats specifically designed for pitching or find one with alignment markers to train your footwork or mats with varying rough depths to better simulate real course conditions.
Step 4 – Buying a Golf Ball Shagger
The whole idea behind building your own backyard driving range is to give yourself an opportunity to hit a lot of balls, but just like on the range, someone has to shag all those shots. That said, even if you’re only hitting a couple of yards into a net, a good golf ball shagger is a very wise investment.
For just a couple of bucks these convenient items will save you time, energy, and plenty of back pain from bending over and scooping up all those balls.
Your entry-level shag units start at around $15 and are great for anyone out there who went with one of the net options we discussed earlier. If you are hitting out into a pasture, you might want to consider a true “shag bag” which can corral up to 75 balls at a time, thus saving you a few trips back and forth.

If you want to take it to the next level for around $50 you can find a combo unit that both shags and dispenses the ball.
Now your cooking! With the basic items down let’s take a look at some bonus upgrades to really trick out your new home driving range.
Bonus Item #1 – Swing and Ball Flight Analyzers
Another benefit of building your own backyard driving range instead of going to the public space is the ability to set up a swing trainer such as TrackMan (if you can afford the hefty $18k price tag) or similar devices. Instead of just swinging into a net aimlessly, you can use these tools to break down every part of your swing and work on them over and over to perfect the perfect golf shot – in theory anyway.
The TrackMan says it maps your swing DNA, comparing how you think it feels to what you are actually doing ‘in real life.’ It tracks and provides instant feedback on smash factor, spin rate, launch angle, carry, ball speed, club speed, dynamic loft, attack angle, club path, and face angle. All this data can be recovered in swings ranging from 6′ pitches to 400 yard drives.
TrackMan is the system used by the pros but as mentioned before the expense is quite prohibitive and unless you recently won the lotto it probably won’t make sense for your DIY home driving range build. That said, there are a number of alternatives you can use to still pull lots of data from your practice session. Here are just a few:
- Ernest Sports ES12 Portable Launch Monitor: For under $200 this handy little launch monitor doesn’t have all the bells and whistles of a TrackMan but it will identify your ball speed and give you a fairly accurate estimate of distance, which is great if you’re hitting into a net. With just under 4 stars on Amazon it’s safe to say that the ES12 is a very popular option for the price. If you want a few additional features you can also bump it up to the Ernest ES14 for around $500.
- Voice Caddie Golf Swing Caddie: A bit less expensive than the ES12, this model is a stand-alone launch monitor that measures things like swing speed, ball speed, carry distance, etc.
- Zepp Golf Swing Analyzer: This wearable device his highly-affordable, coming in at under $150 and provides lots of data points that relate to your swing. Simply pair the Zepp to your smartphone via Bluetooth and monitor everything from swing speed to swing path. The device even offers a “smart coach” that offers personalized training info based on the feedback Zepp gets from your swing.
Again, while certainly not a requirement of your backyard driving range DIY build, devices like launch monitors and wearable swing analyzers are excellent for gathering detailed data about your practice session. Best of all, given all the advances in recent technology, systems like these that used to cost thousands of dollars have become much more accessible to average golfers.
Bonus Item #2 – Video Swing Analysis
Even just 15 years ago many of us would have killed for the ability to record our swing in super-slow-motion. Nowadays the majority of us have a phone in our pocket that shoots in upwards of 240 frames per second!
With that in mind, you can make your home driving range work even harder for you by adding a few inexpensive items to help you capture every swing on video for deeper analysis both during and after your practice sessions.
Here are just a few suggestions:
- Smartphone Tripod Kit – This universal tripod kit is made to work with just about any modern smartphone. Best of all, it’s highly portable (so you can even bring it to the golf course) and it’s quite inexpensive.
- Bluetooth Camera Remote – With this handy little device there’s no longer a need to run back and forth to your smartphone to start and stop the video! Just throw the small remote in your pocket and you can control your camera’s shutter with ease.
If you don’t already have a smartphone that will take slow-motion video, you can easily pick up a point-and-shoot camera like this one that is specifically designed for capturing your golf swing.

Once you’ve captured your swing you’ll be able to do everything from comparing your swing to some of the pros on YouTube, to even sending your swing directly to your golf coach for further analysis.
If you really want to dissect your golf swing video you can invest a few bucks in dedicated swing analysis software like the V1 Golf Academy which allows you to overlay alignment lines and angle measurements directly onto your video. Even better, software like this will also enable you to display two swing videos side-by-side so that you can make comparisons between two of our swings (to track your progress) or even compare you swing directly to a professional swing that you’d like to emulate.
The Final Word
The main theme of building your own backyard driving range is that you definitely have options. You can spend $2,000 – $3,000 for all the bells and whistles or you can take the “DIY” route and come up with a niece setup for couple hundred bucks.
How deep you delve depends on how serious you are about improving your game. The most important thing though is that you’re playing no matter how much is invested in your home driving range.
As Lee Trevino said, “There is no such thing as a natural touch. Touch is something you create by hitting millions of golf balls “
Cover Photo Credit Kris McEwen

Is LIV Set to Make More Big Changes to Survive?

Best Golf Gifts for Dad: Father’s Day Gift Guide 2026
Another Major PGA TOUR Schedule Shakeup
 | Save with the GOLFICITY Discount")
Lagoon Sleep Coupon Code (2026) | Save with the GOLFICITY Discount

7 Underrated Tips to Get the Most Out of Your Next Golf Trip
Another Major PGA TOUR Schedule Shakeup
7 Underrated Tips to Get the Most Out of Your Next Golf Trip
Is LIV Set to Make More Big Changes to Survive?
Best Golf Gifts for Dad: Father’s Day Gift Guide 2026
Lagoon Sleep Coupon Code (2026) | Save with the GOLFICITY Discount

We Played This Old Golf Course Where Thomas Edison Was A Member

Are You MEASURING Your Golf Swing Correctly? (This Can Help)

Zach Johnson Explains Why He Didn’t Pick Bryson DeChambeau for the Ryder Cup

Justin Thomas FIRES Coach before Ryder Cup…Who’s Next?
